If you’re flying into Thailand any time after May 1st, there’s something important you need to know before landing. Whether you’re coming in by air, land, or sea, you now need to fill out a new digital form called the Thailand Digital Arrival Card.
It doesn’t matter if you’re coming in on a tourist visa, visa-free, or even a long-stay visa. As long as you’re not a Thai citizen, this form is now part of the entry process. And if you show up without it, you won’t get through immigration.
The form itself isn’t too complicated, but there are a few parts that can be confusing. In this post, I’ll walk you through exactly how to fill it out, step by step, and how to fix it if you make a mistake along the way.
Accessing the Form
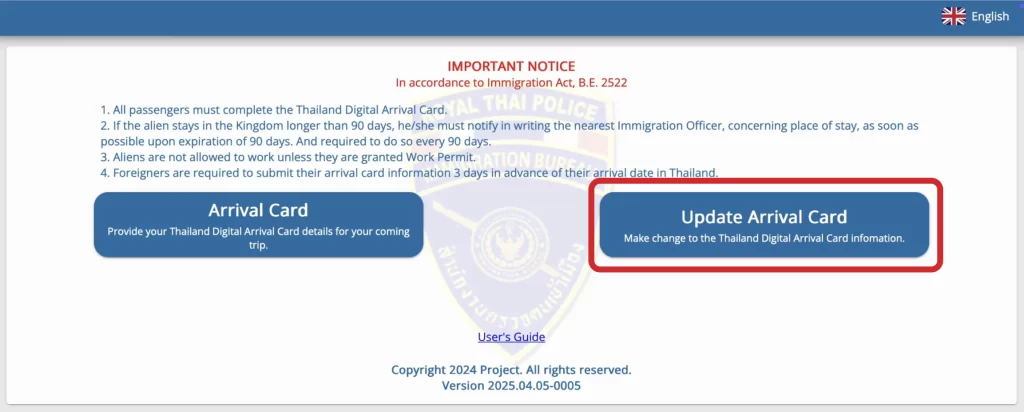
To begin, go to the Official Thailand Digital Arrival Card Website. Once the page loads, you’ll see two main options: one for first-time submissions, and another if you need to update something later.
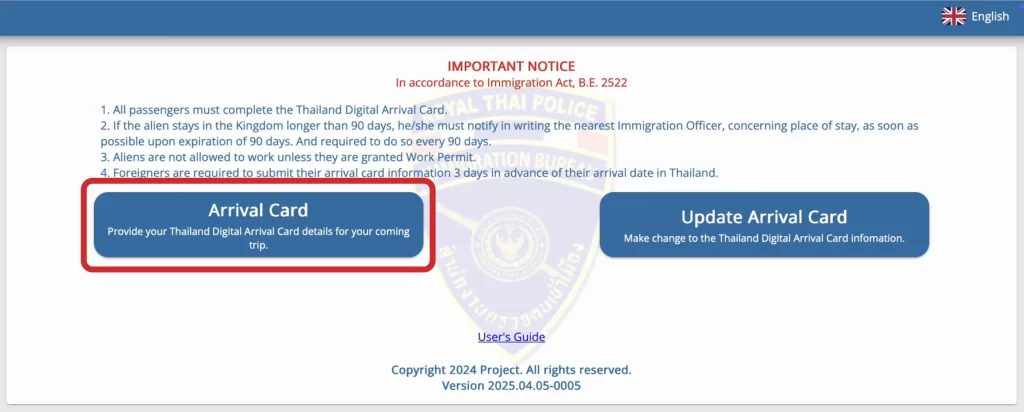
Click on “Arrival Card” to start a new form. If you already submitted yours and need to change your flight or hotel, you’ll come back later and use the “Update Arrival Card” option.
Step 1: Personal Information
This first section is where you enter your personal details.

1 – Start by filling in your name exactly as it appears in your passport. Begin with the “Family Name” and “First Name” fields. If you have a “Middle Name”, you can add it too. If not, just leave it blank. Try to match everything exactly the way it’s written in your passport.
2 – Next, you need to type your Passport Number, then choose your Nationality/Citizenship from the dropdown menu. Just a tip here, start typing the first few letters of your country to find it faster.
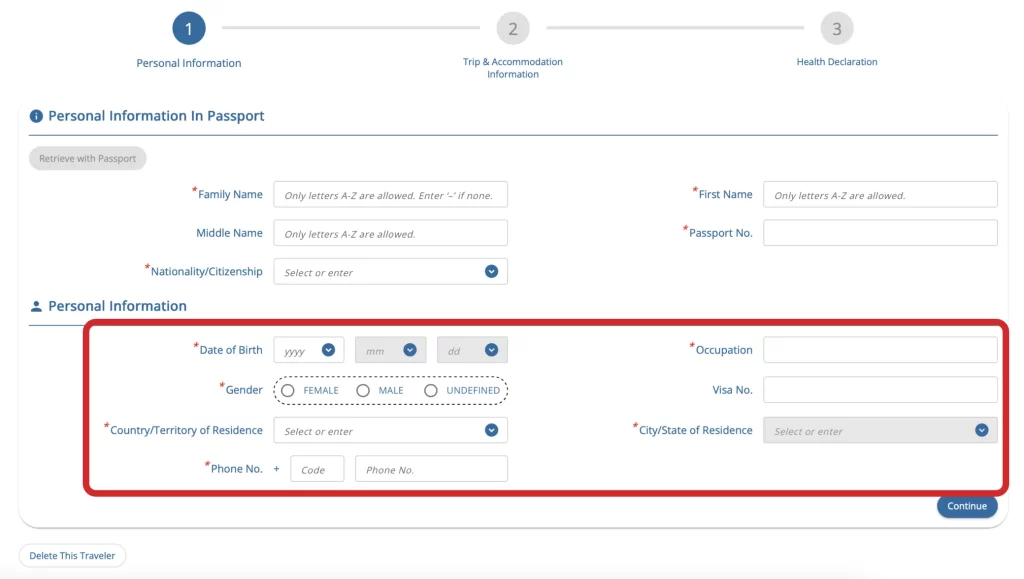
3 – After that, you’ll enter your Date of Birth and select your Gender.
4 – You’ll also be asked for your Occupation. You can write anything simple here, like student, teacher, retiree, freelancer, whatever fits.
5 – Then it’ll ask for a Visa Number. If you’re entering Thailand visa-free or with a visa on arrival, you can leave this blank. It’s only required if you already have a visa issued by an embassy or consulate.
6 – Now add your Country/Territory of Residence and your City/State of Residence.
7 – Then your Phone Number, which can be either your number from back home or a Thai number if you already have one. They won’t call you, it’s just part of the form.
Once everything looks good, click “Continue” to move on to the next step.
Wise Travel Card
The best way to carry and withdraw money abroad is with the Wise Travel Card. We’ve used it in over 15 countries and saved a lot on fees. Click the button below and get yours!

Step 2: Arrival and Travel Details
This next section is all about your trip to Thailand.
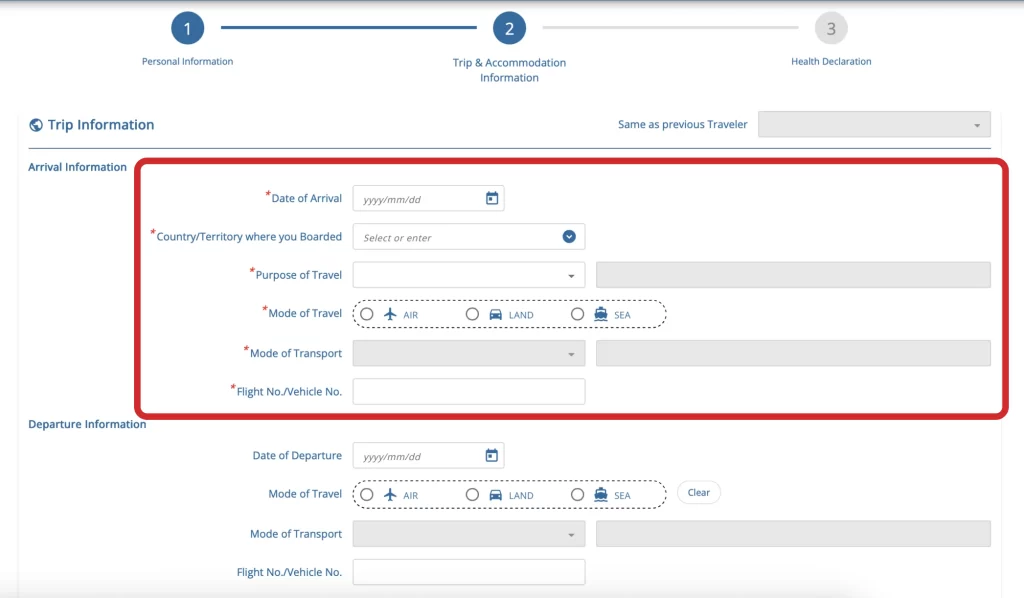
1 – Start by selecting your “Date of Arrival”. The form only lets you select an arrival date within the next 72 hours. For example, if today is the 27th, you can only choose an arrival date up to the 30th. If your date doesn’t show up as clickable, it’s probably too early to apply.
2 – Now you’ll be asked for the “Country/Territory Where You Boarded”. This means the country where your flight or journey starts. If you’re flying in from Paris, that’s France. If you’re crossing a land border from Laos or Malaysia, that’s what you’ll enter.
3 – Then choose your “Purpose of Travel”. Most travelers will select “Holiday”, especially if you’re entering with a tourist visa or using the visa exemption. But if you’re coming for work or study and have the right visa for that, you can pick the option that fits your case.
4 – After that, pick your “Mode of Travel”, like air, land, or sea, and then the “Mode of Transport”. If you’re flying on a regular airline, choose “Commercial Flight”.
5 – Next, enter your “Flight Number”. This should be the same one printed on your boarding pass and in your email confirmation from the airline.
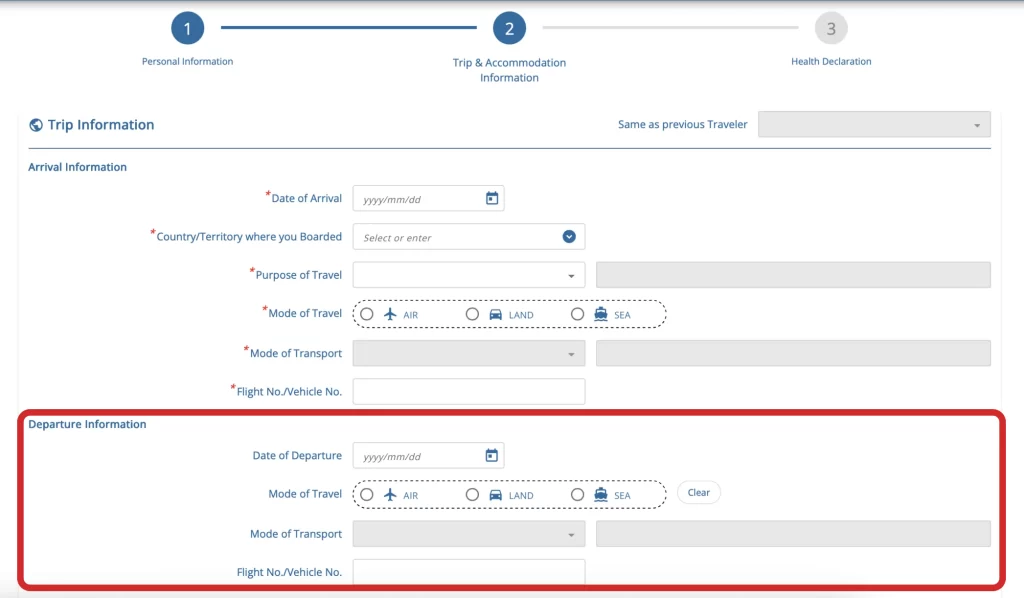
6 – There’s also a section for your “Departure Information”. This part is optional, so you can leave it blank, but just know that Thai immigration officers might ask for proof of onward travel when you arrive. Especially if you’re using a visa exemption.
So even if you don’t fill it in here, it’s smart to have something ready to show, like a return ticket or a bus reservation out of the country.
Travel Internet
Stay connected abroad with the Airalo eSIM. Forget the hassle of physical SIM cards and get connected as soon as you arrive. Use the code THENOMADICJOURNEY to get 10% off.

Step 3: Accommodation in Thailand
Right below the departure information section, you’ll see the part where you enter your accommodation details.
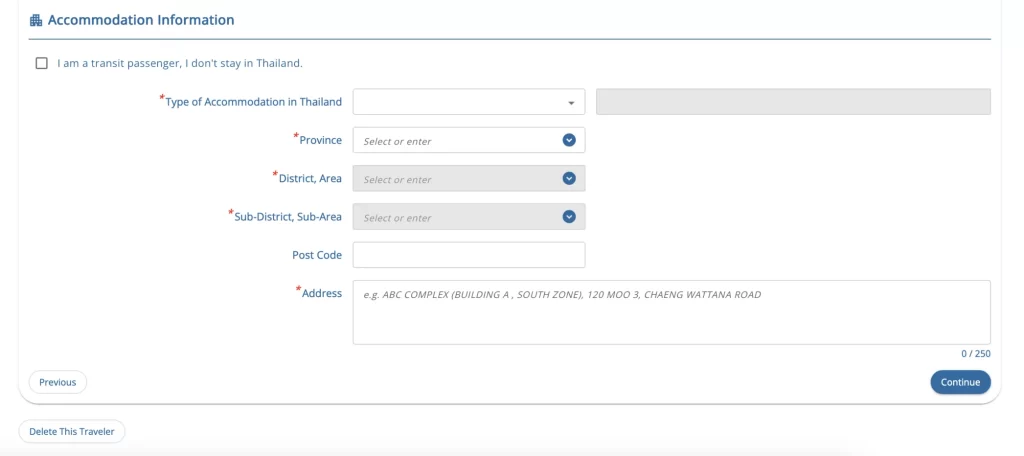
1 – If you’re only transiting through Thailand and not passing through immigration, there’s a checkbox for that, but in most cases it’ll be disabled. So if you’re entering the country, you’ll need to fill this section out.
2 – Start by selecting the “Type of Accommodation in Thailand”. That could be a hotel, apartment, or any other option that fits your situation.
3 – After that, you’ll choose the “Province” where you’ll be staying, then the “District/Area”, followed by the “Sub-District/Sub-Area”.
4 – Next, you’ll enter the “Postal Code”.
5 – Finally, there’s a field labeled “Address”. This is where you write out the full street address, including the hotel name, street name, building number, or anything else that’s part of the official address.
💡 Tip: If you’re planning to stay in more than one place during your trip, you only need to enter where you’ll be staying on your first night in Thailand.
Once you’ve filled in everything, click “Continue” to move on.
Step 4: Health Declaration
The last step is the health declaration. This part is pretty quick, but it’s important.
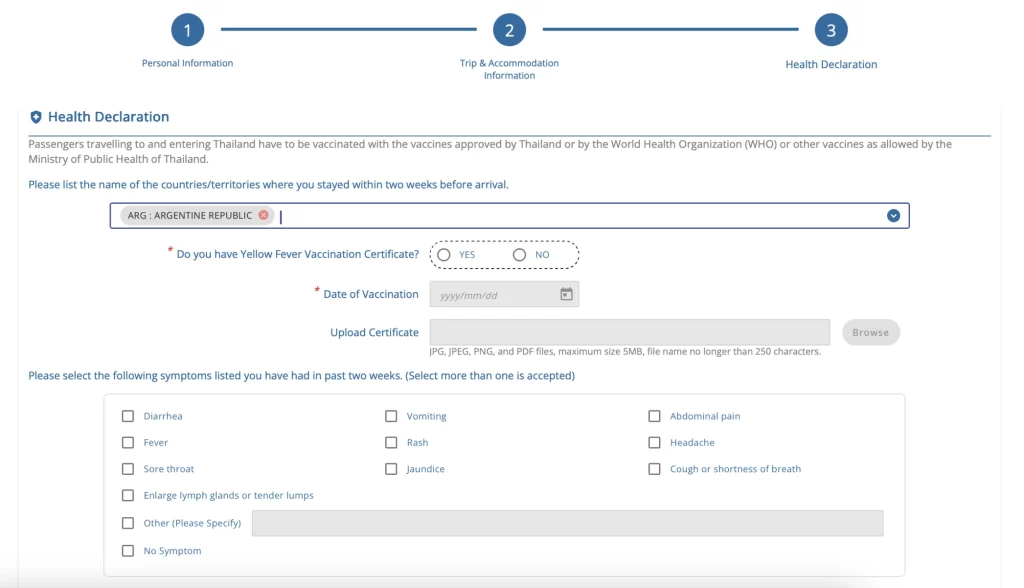
1 – You’ll be asked to list the countries where you stayed during the 14 days before arriving in Thailand. That includes layovers too, but only if they were longer than 12 hours. So let’s say you flew from Brazil and had a 14-hour layover in Ethiopia. In that case, you’d need to enter both Brazil and Ethiopia. But if your connection was just two hours, you don’t need to include it.
2 – If you select a country that’s considered a risk area for yellow fever or other infectious diseases, the system will ask for more details.
3 – You’ll need to confirm whether or not you have a yellow fever vaccination certificate. If you do, you’ll be asked to enter the “Date of Vaccination” and upload your certificate.
4 – Then you’ll select whether you’ve experienced any symptoms or if you’ve had none at all.
This step is mandatory for travelers coming from countries that are considered high-risk for yellow fever. You need to have the international certificate in that case.
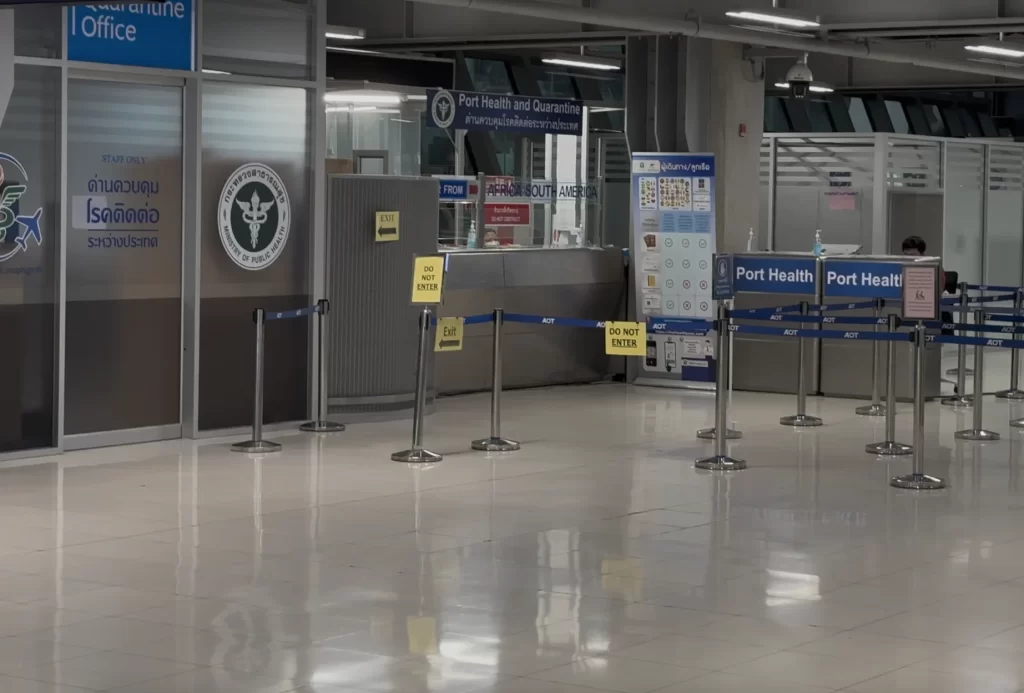
At the airport, you’ll usually need to stop at a Health Control Desk before going through immigration to show your yellow fever vaccination certificate. Only after that will you be allowed to continue to the immigration checkpoint.
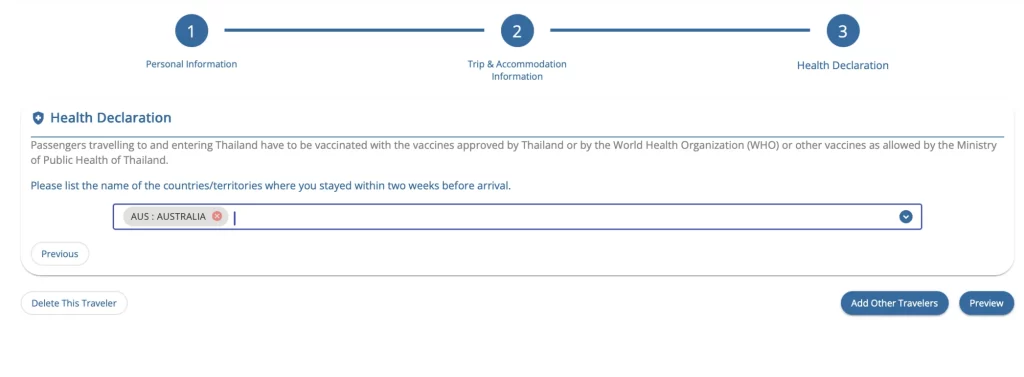
If you’re arriving from a country without any yellow fever risk, like Australia, you won’t have to upload anything. In that case, you can just move on and click “Preview.”
Review and Submission
Before you hit Submit, the system will show you a full preview of your form. Take a few minutes to double-check everything. Make sure your name, passport number, travel dates, and accommodation are all correct.
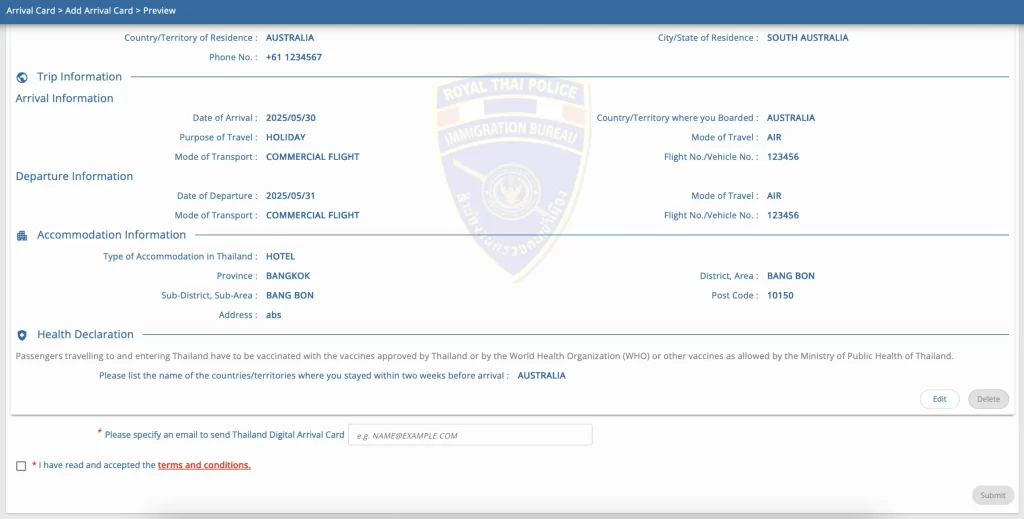
1 – Then type in your email address. This is where your confirmation will be sent.
2 – Agree to the terms and conditions, and click “Submit.”
You’ll now see a confirmation screen, and you’ll also get an email with a downloadable version of your Thailand Digital Arrival Card. Save it on your phone or print it out, because you’ll need to show it at immigration when you arrive.
If You Need to Update Something
If you need to change any information, like your flight details or the name of your hotel, you can go back to the official website and select “Update Arrival Card.”
Just one heads-up. You can’t change your passport information after submitting the form, so double-check those details before you hit “Submit.”
Travel Insurance
Stay covered with SafetyWing during your trip. Get protection for medical emergencies, travel delays, lost luggage, and more in over 180 countries, with 24/7 support.

Final Notes
This new system is designed to speed up immigration and improve border control. If you fill it out correctly before your flight, things should go quickly and smoothly when you land.
But if you forget or can’t complete it online, don’t panic. There will be help desks at the airport, but those are meant for emergency situations, and the process will take longer. So it’s way better to do this ahead of time.